Now you are probably wondering which one is the solution you seek: image optimization or image compression. Answer is: “Doesn’t matter”. You are someone with a new website, you probably just realized you shouldn’t be uploading images directly to your website after seeing your website slowing down. You are reading the right post, keep reading.
If you are uploading 8 MB images you find on google images directly to your website without any optimization, that will slow your website down. Try downloading images from “TechCrunch” and “Huffington Post” and check the size of these images; they rarely exceed 100 KB.
You are probably not even using dedicated hosting like professional websites, so the equation you should know is “Shared Hosting + 5 MB Images = Very Slow Website” and nobody likes slow websites. If loading time of the website increases, most of the visitors don’t even bother and leave your website without seeing anything. You spent too much time, maybe weeks to prepare a single post and people are leaving because your website didn’t load in time; really annoying, right?
You might consider image quality is more important than the loading time but optimizing your images doesn’t mean loss in quality. Image optimization is decreasing the size of an image without losing any quality but in order to make that happen you need a software called Photoshop.
There are also some other websites to optimize images online but Photoshop means more elasticity. Besides, Photoshop is right hand of a blogger and sooner or later you need to use Photoshop. You will also need to resize image before uploading because larger image dimensions mean more file sizes. Most of the websites have sidebar and I am assuming your website has a sidebar too, so there is about 700 pixel left to put an image in your post. As you can see there is no point of using large images.
If you are still thinking about difference between compression and optimization, basically:
- Compression: Reducing the file size of the image without losing any quality.
- Optimization: Compression + Reducing Dimensions
Reducing dimensions is an important step too. The images you find sometimes will have big dimensions like 3456 x 2304 pixels and you don’t want to upload it without making it something like 700 x 500 pixels.
Finding An Image
Let’s say you will write an article about gardening and you need an image. Don’t google images with “gardening” and don’t use images from google. Google images will show images from other websites with higher SEO, so these images are already used by someone popular, don’t use them again. You need to find stock photo websites for this particular job and I am assuming you don’t have enough budget to buy stock photos from “Getty Images”, you need to find free stock photos. There are quite a few websites where you can find high quality free images but this is another story for another post.
For a starter, you can use Flickr to find images for your website. Images should have high resolution in order to optimize them properly. So let’s talk about finding a good image from Flickr.
1. Search An Image
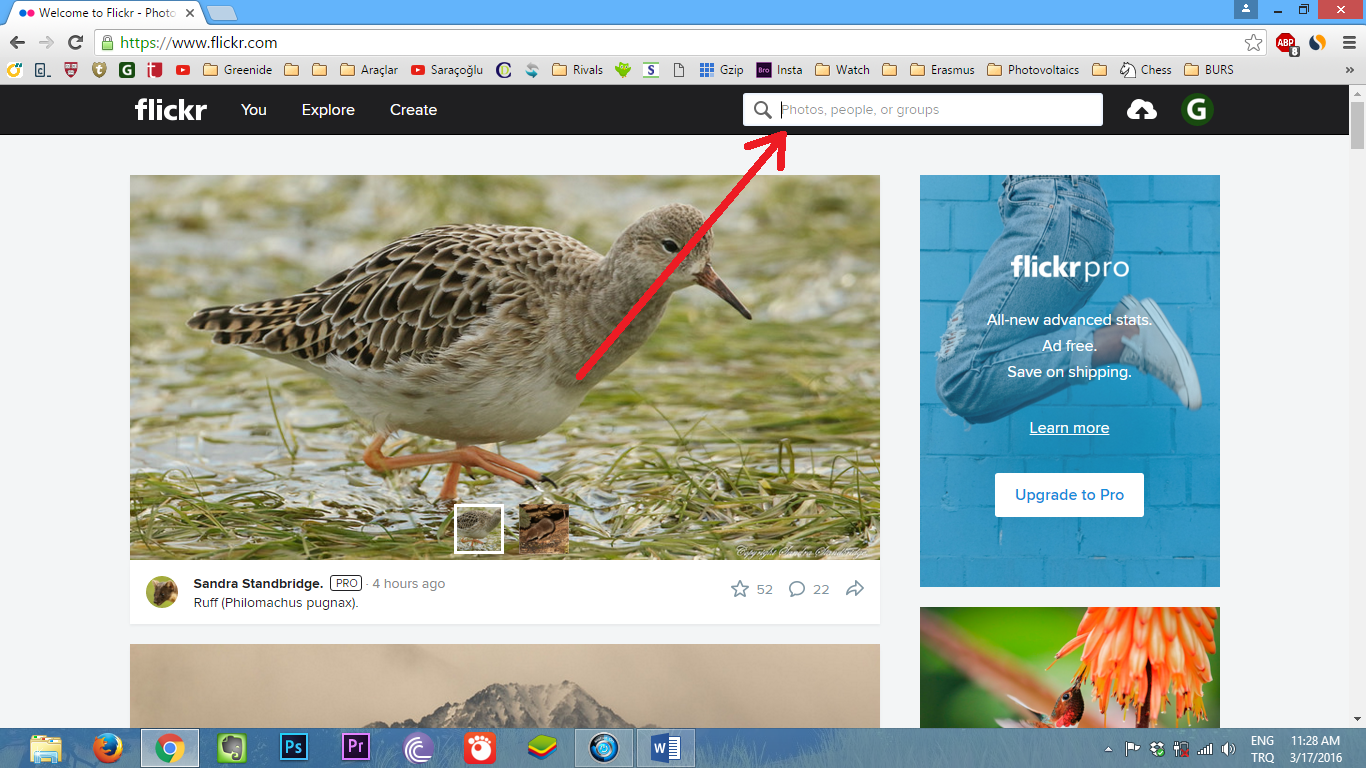
Type the keyword you want to search; I will use “gardening”.
2. Narrow Down The Results
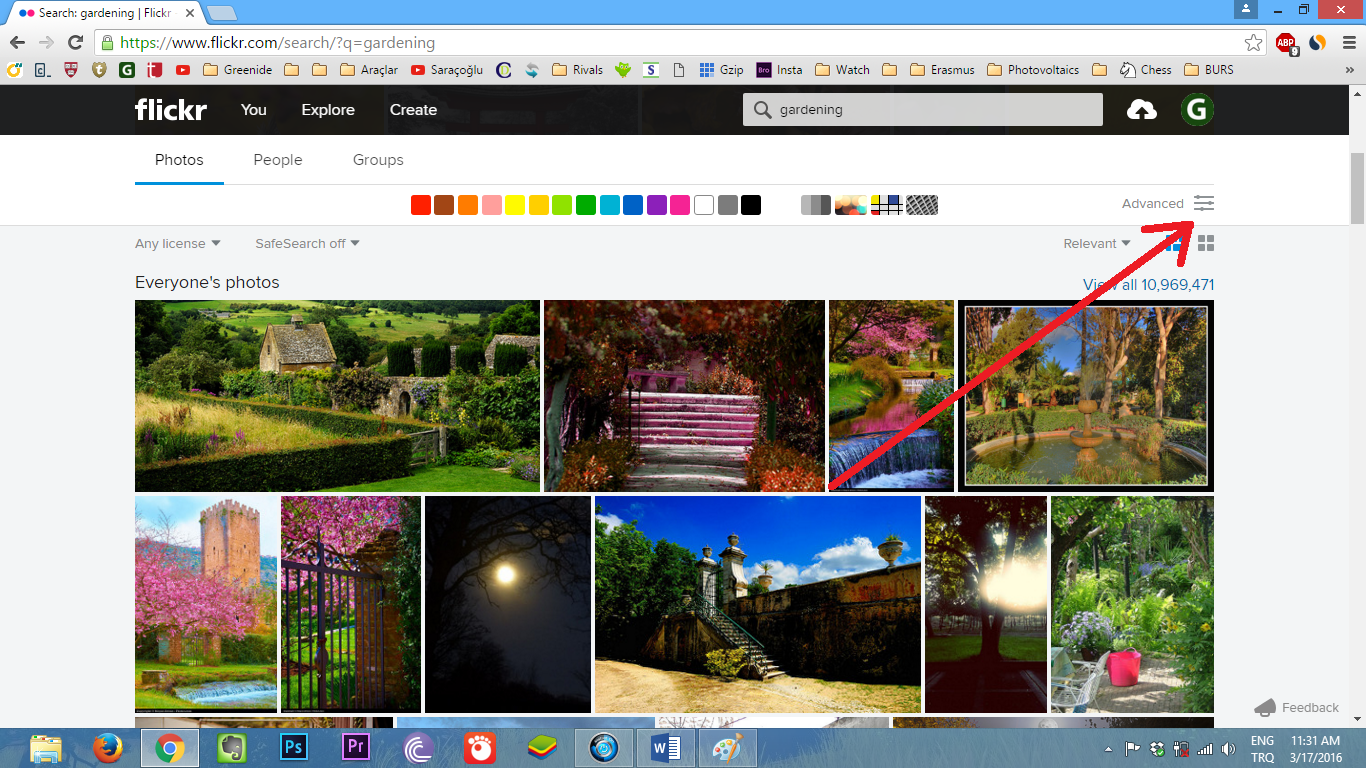
Click the “Advanced” button as you can see below.
3. Adjust The Variables
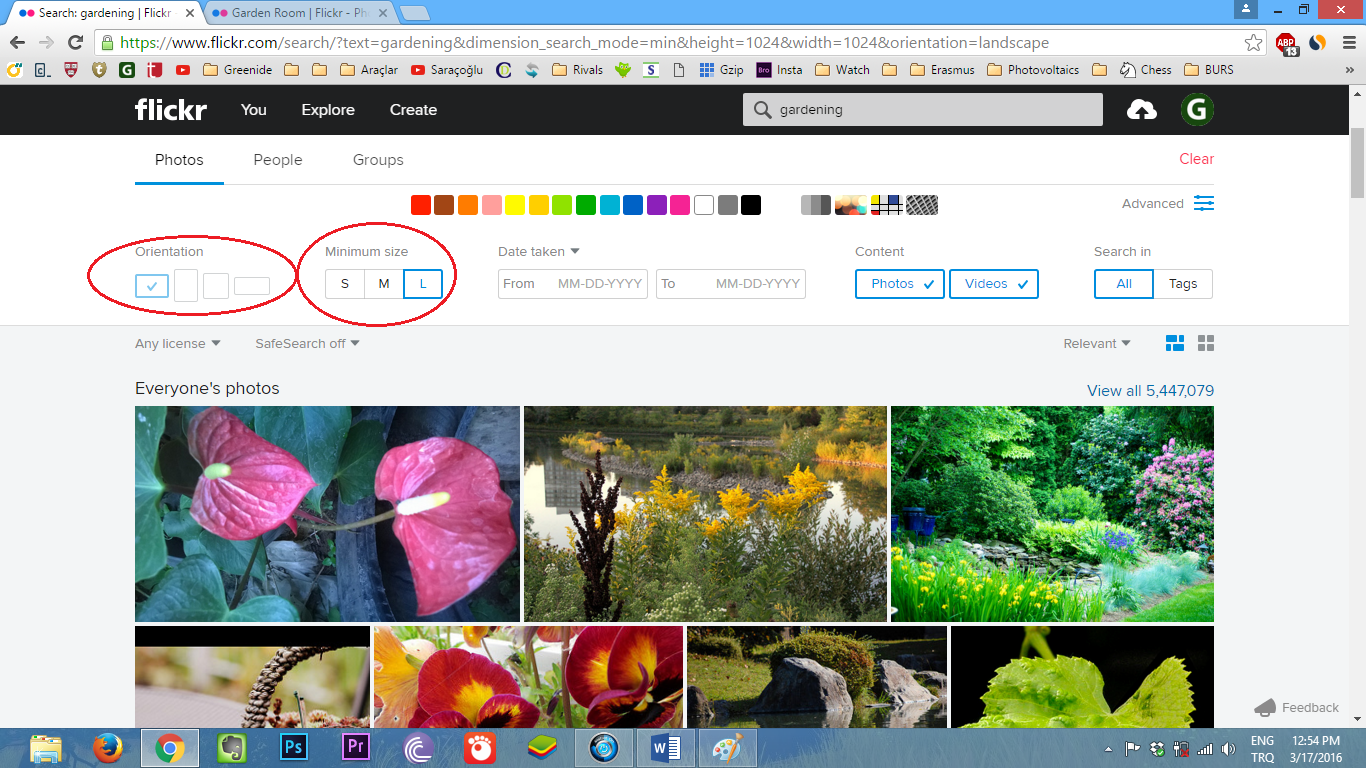
In “Orientation” section, all of them checked by default. Uncheck “Panorama”, “Square” and “Portrait” so only box checked will be “Landscape”.
In “Minimum size” section, Small [S] is checked by default. Select Large [L] because you can’t compress low resolution images well enough.
4. Choose The Right Image
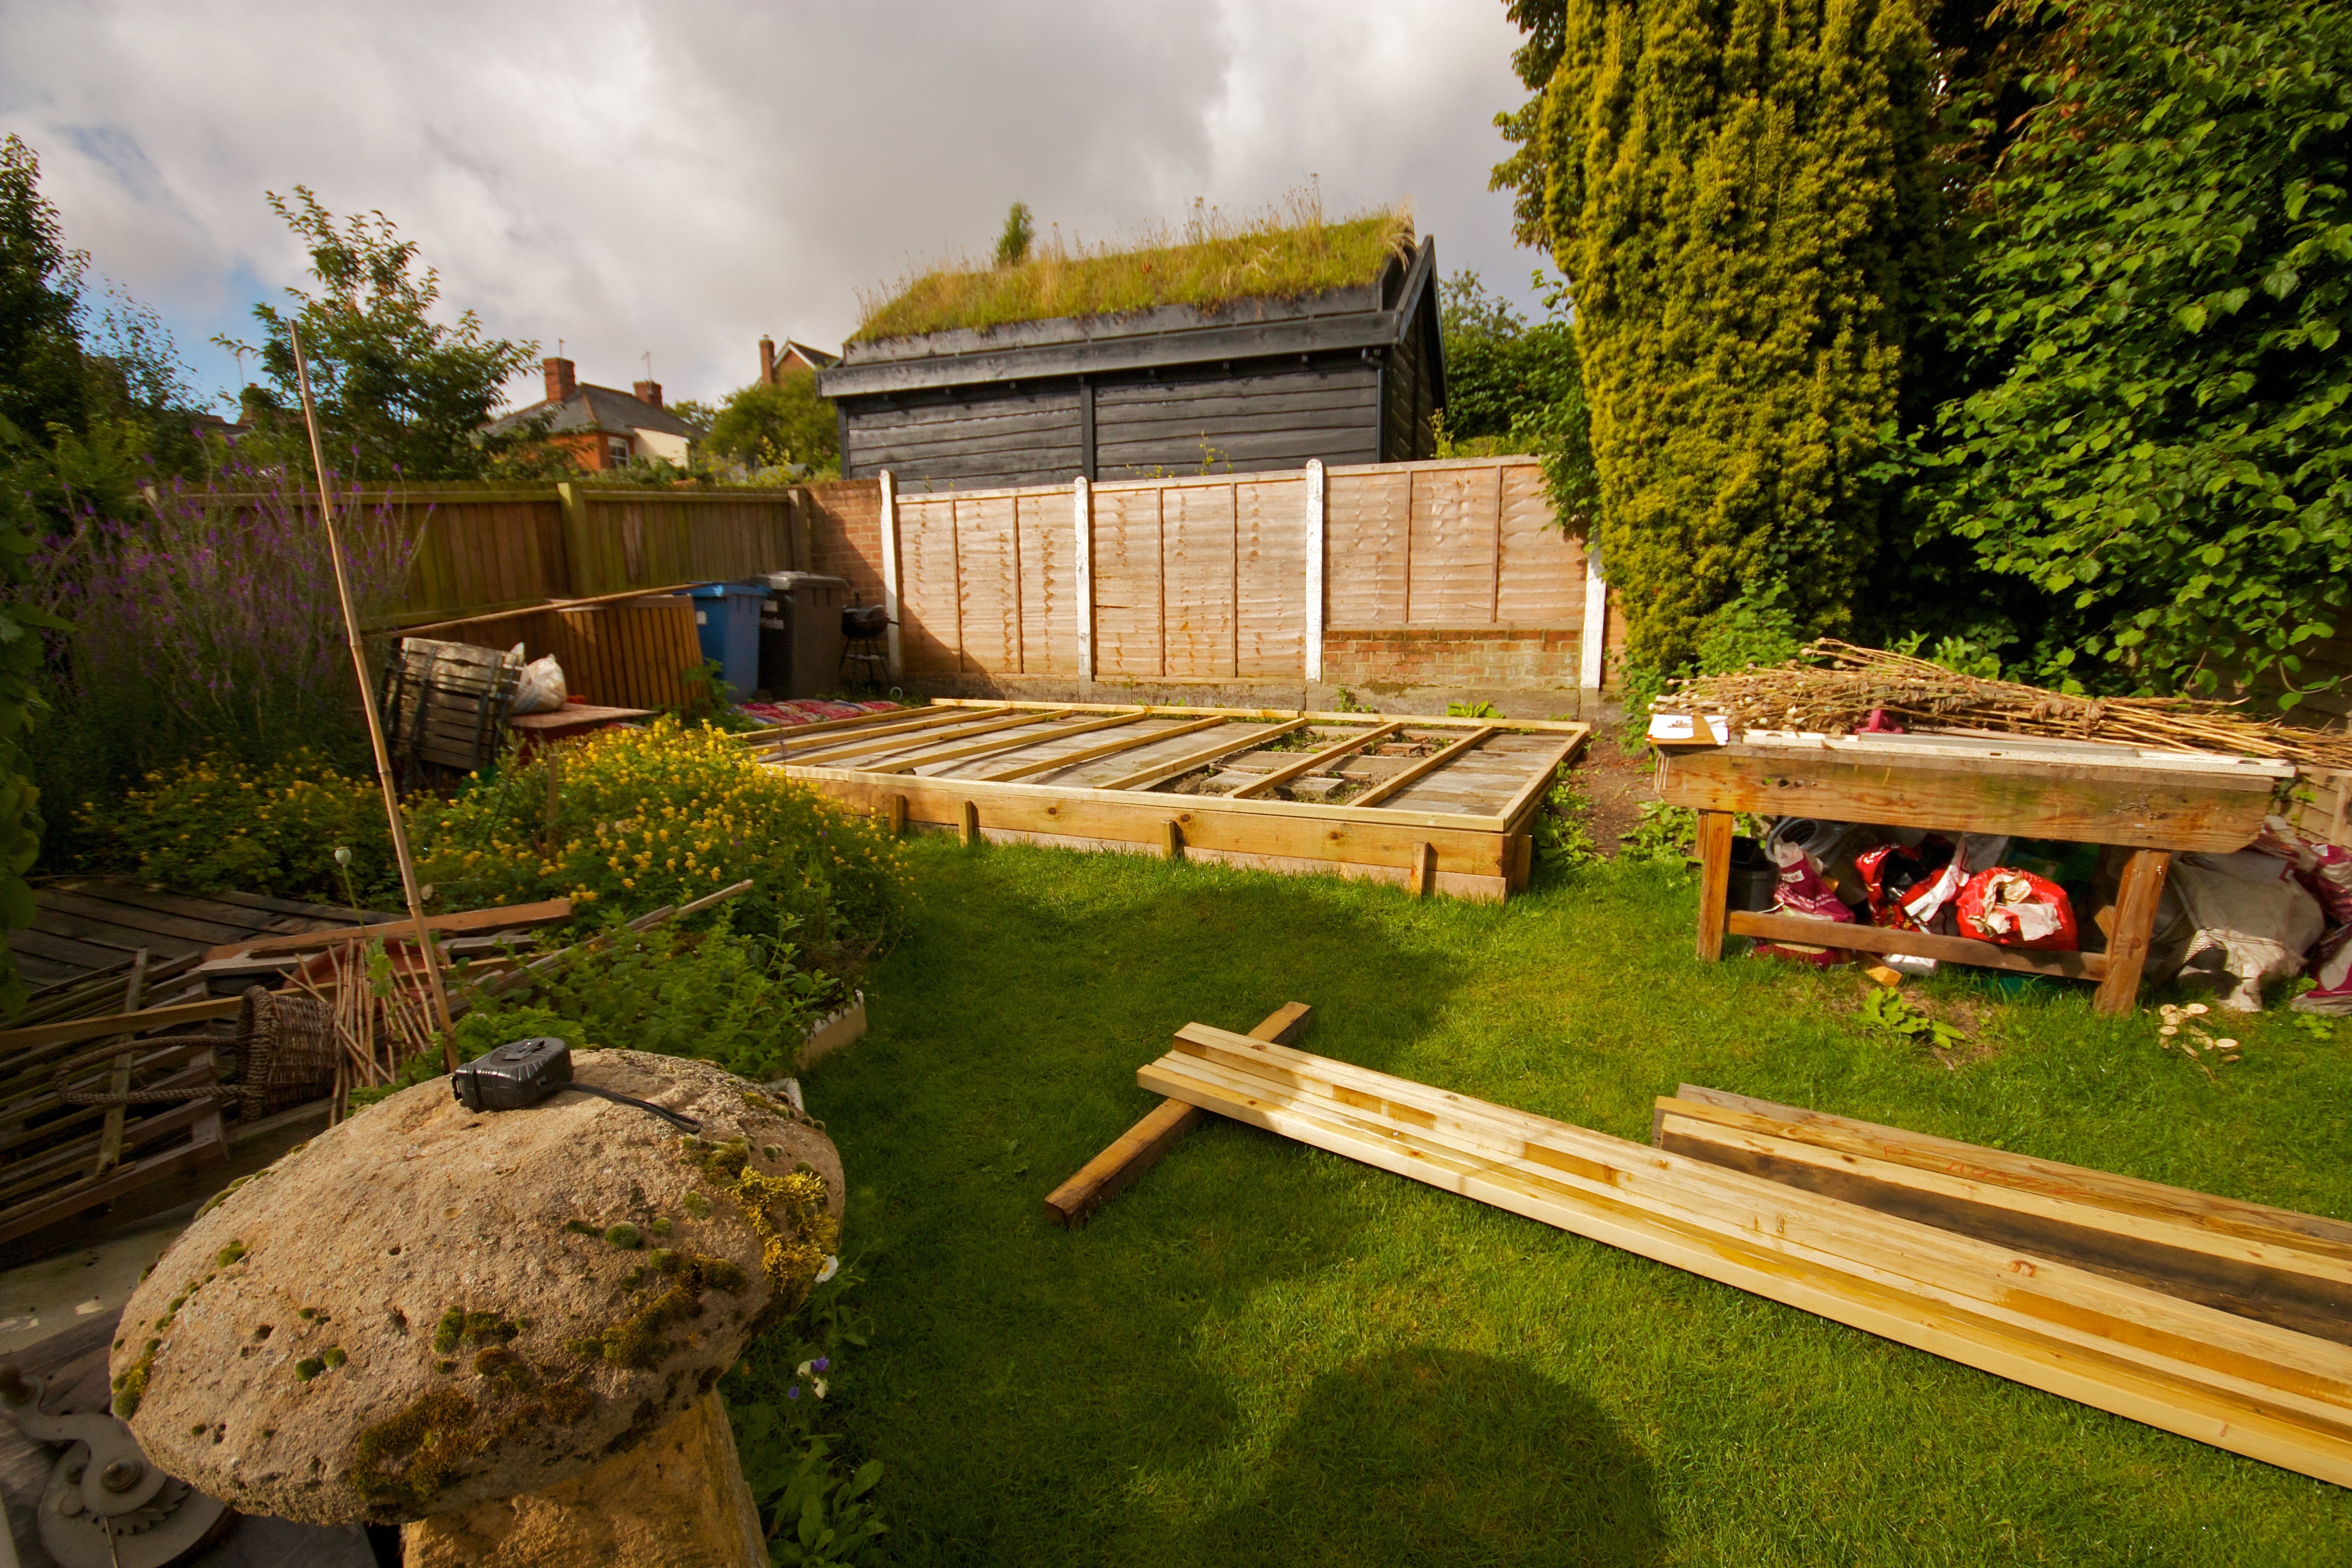
Click the “Advanced” button to slide it up. Finding a good image is important, most of the people will decide to read or ignore your post just by judging the image. It sometimes takes me hours to find a good image and I think this is the hardest thing about blogging. Be sure to choose brighter images with high resolution like the picture you see above.
5. Download The Image
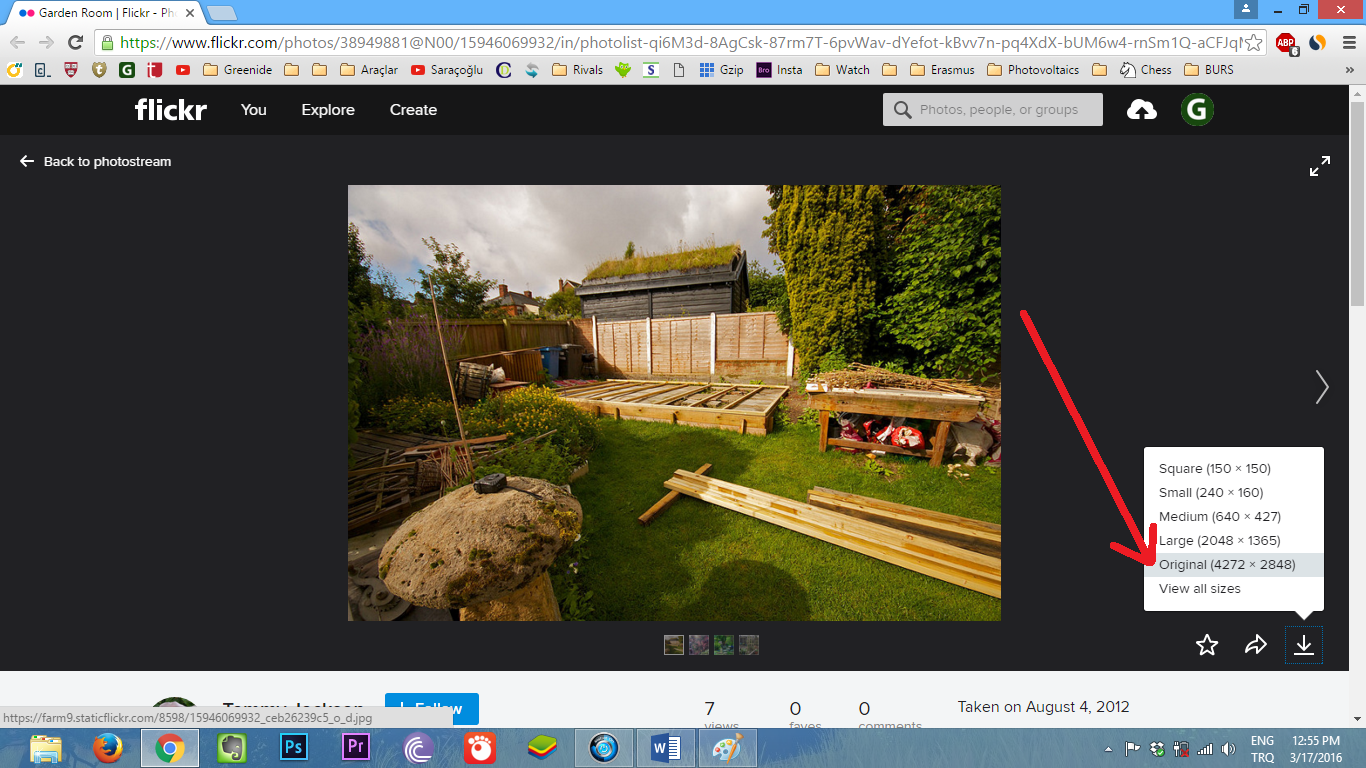
Choose “Original” while downloading the image.
6. Give Credit
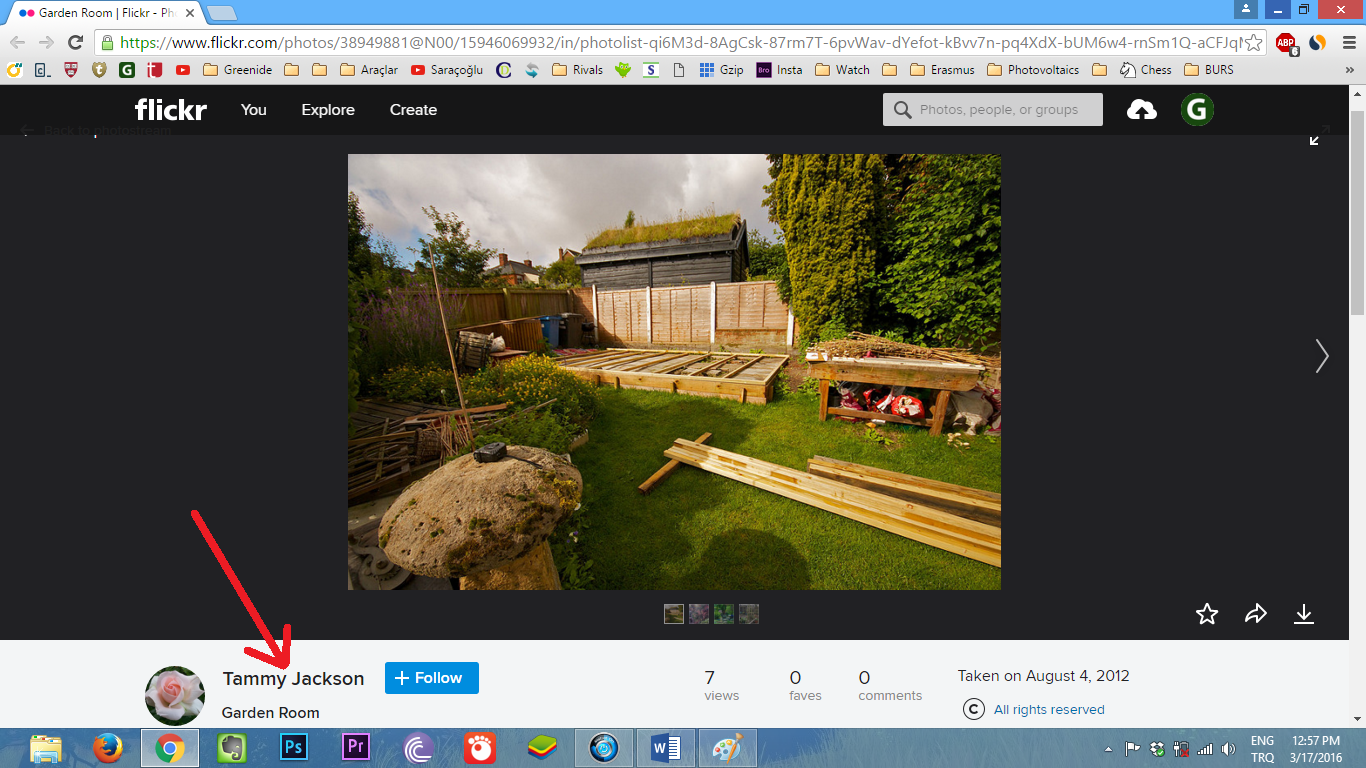
Be sure to note down the username in order to attribute the image owner. People will respect you as long as you respect other people’s work and it is sort of theft not to give credit while you are using other people’s pictures.
Tip: By saving the images like “Name of the article – image owner” will save you from a lot of trouble.
For this post, you can use “Beauty Of Gardening – Tammy Jackson”.
If you are using any other sources than Flickr, you can also add website name like “Beauty Of Gardening – Tammy Jackson, Flickr”.
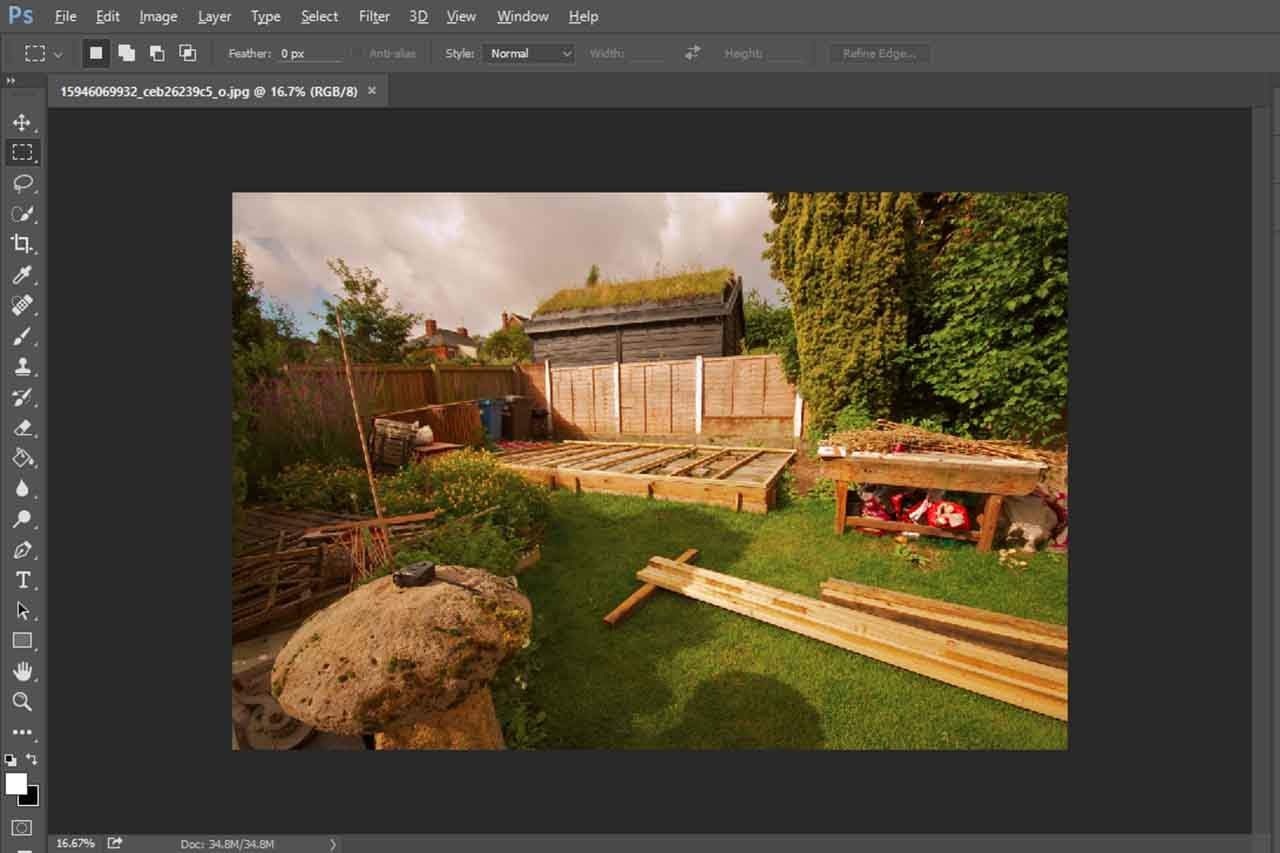
Optimizing The Image
1. Open The Image In Photoshop
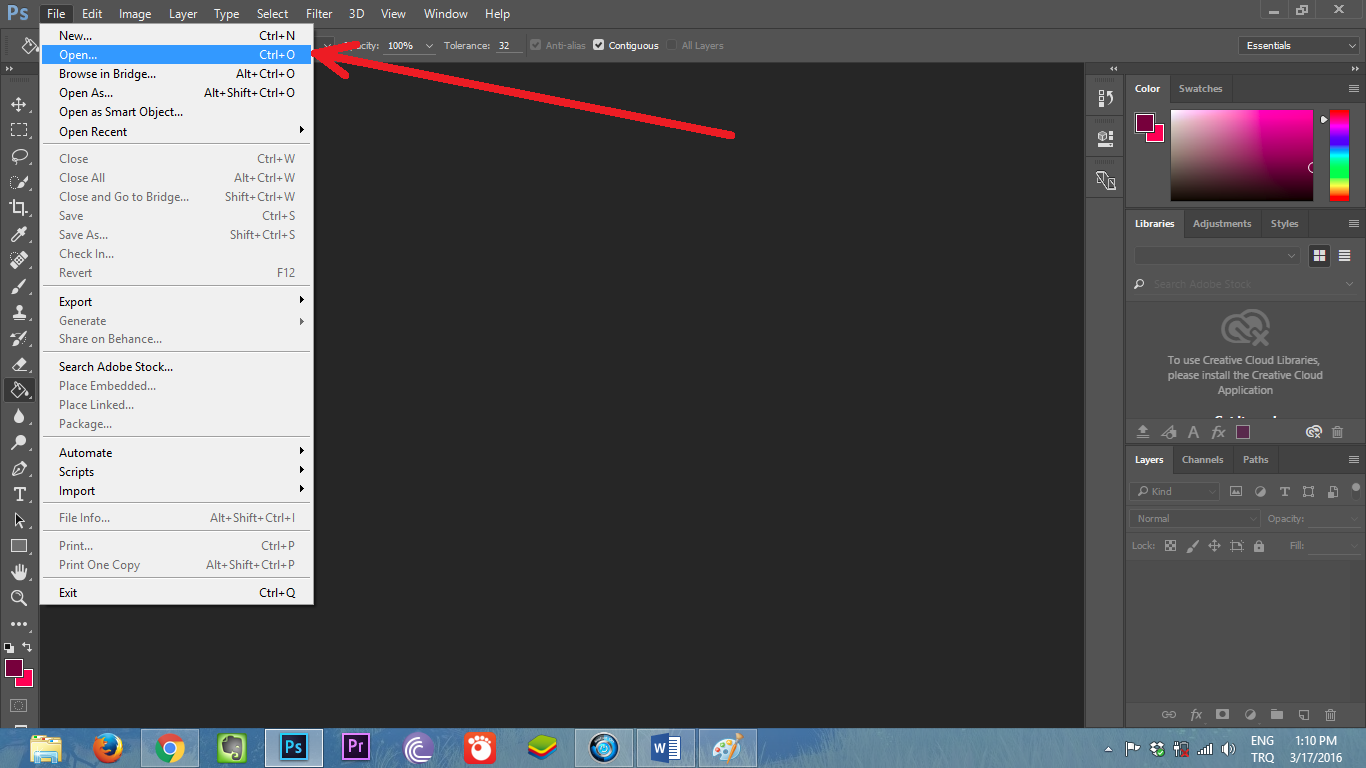
Click “File” button on the top menu and then click “Open”. Choose the image you downloaded.
2. Adjust The Filters
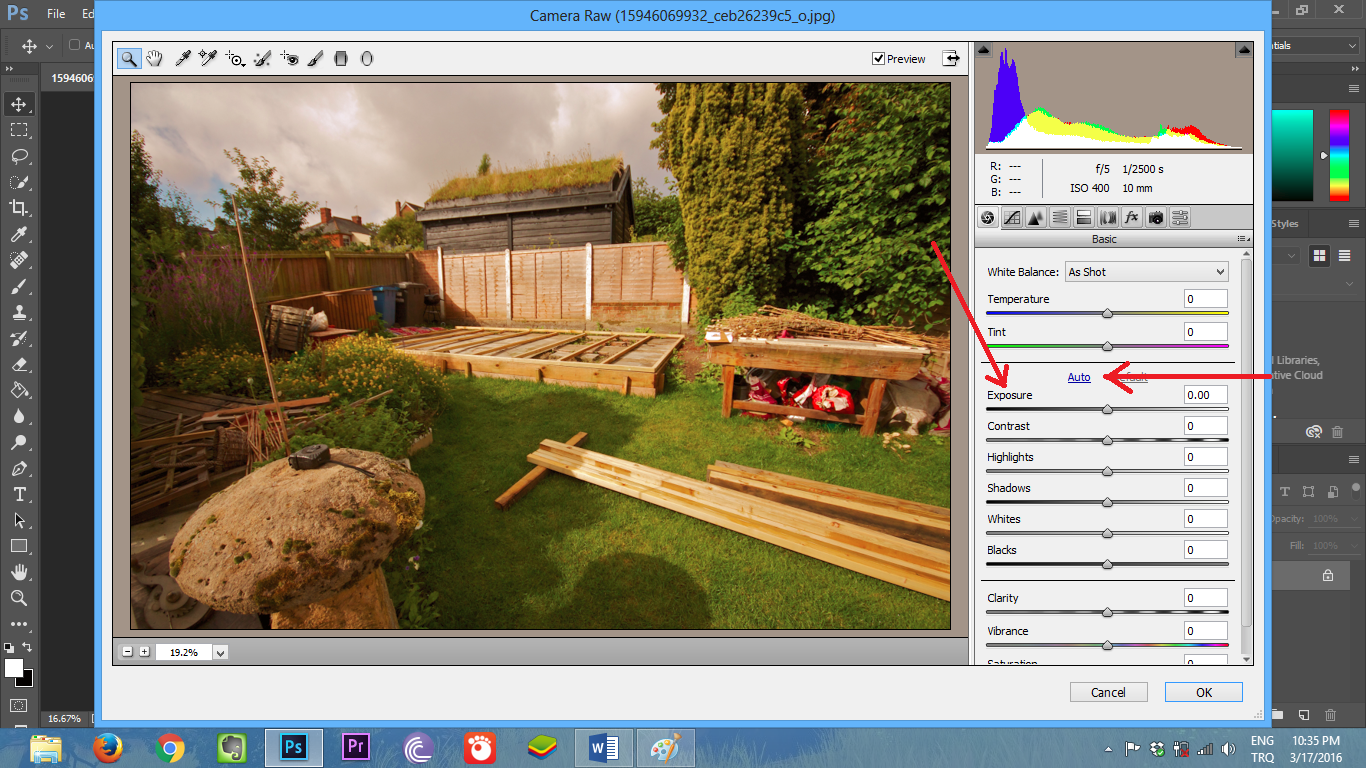
Click “Filter” on the top menu and then click “Camera Raw Filter…”.
Clicking the “Auto” button usually works for most pictures but if the brightness decreases after you click, then increase the “Exposure” back to “0” to bring brightness back to normal.
You may also play with “Temperature” and “Tint” and if something goes wrong, just click “Cancel” and start over.
This step actually doesn’t change the image size but optimization means making images look better, right?
3. Resize The Image
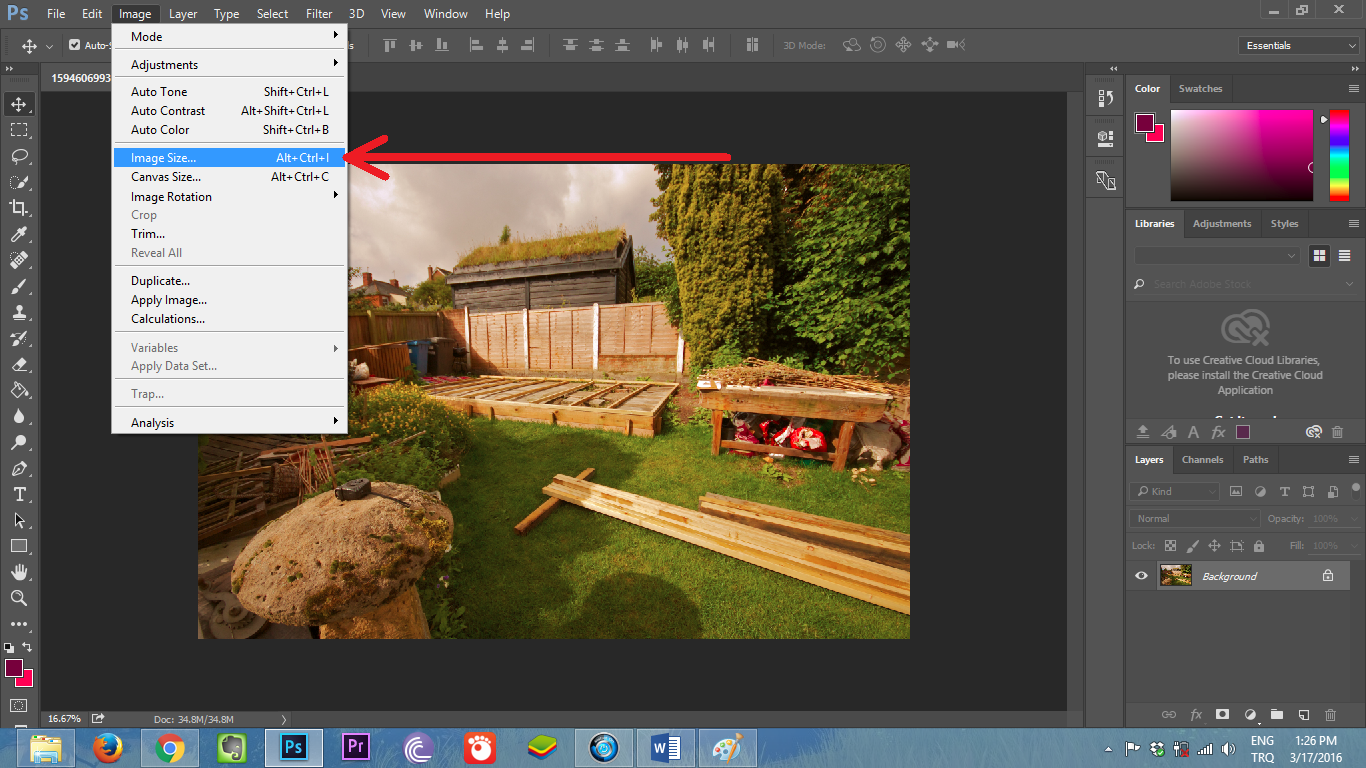
Click “Image” on the top menu and then click “Image Size…”.
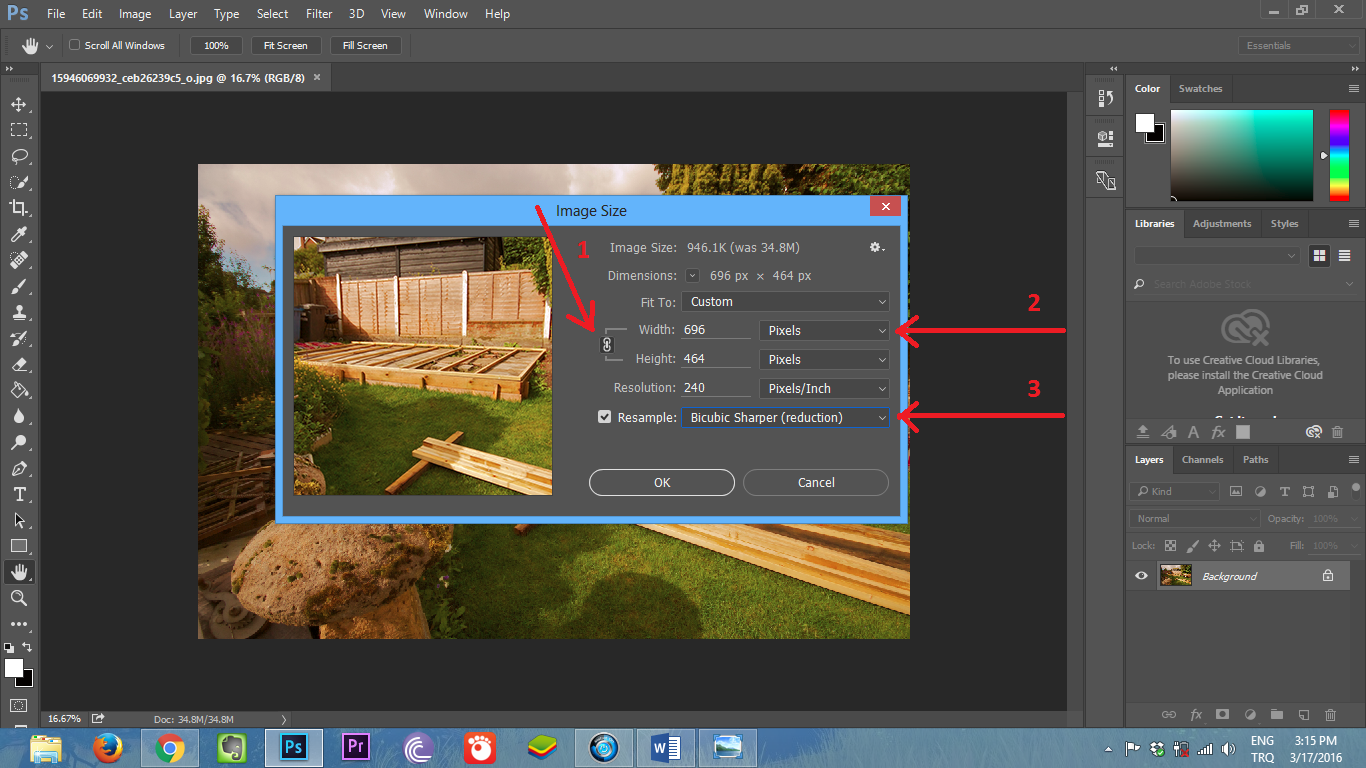
#1 – Select “fixed” ratio for width and height.
#2 – Select “Pixels” for unit.
#3 – Select “Bicubic Sharper (reduction)” for resample.
#4 – Enter proper width and height for your image.
WordPress theme I use works with “696 px X 464 px” that’s why I have entered these values. I am assuming you are also using WordPress or at least you didn’t create the theme you use. Every theme has documentation so find yours and learn which image size works better with your theme.
4. Crop The Image
Normally resizing image wouldn’t give you the exact dimensions. While I resizing, I enter 696 pixels for width and then height automatically become 464 pixels, because that’s the original width-height ratio. What if my theme needs “696 px X 400 px” image? So after resizing it, we need to crop some pixels from the height.
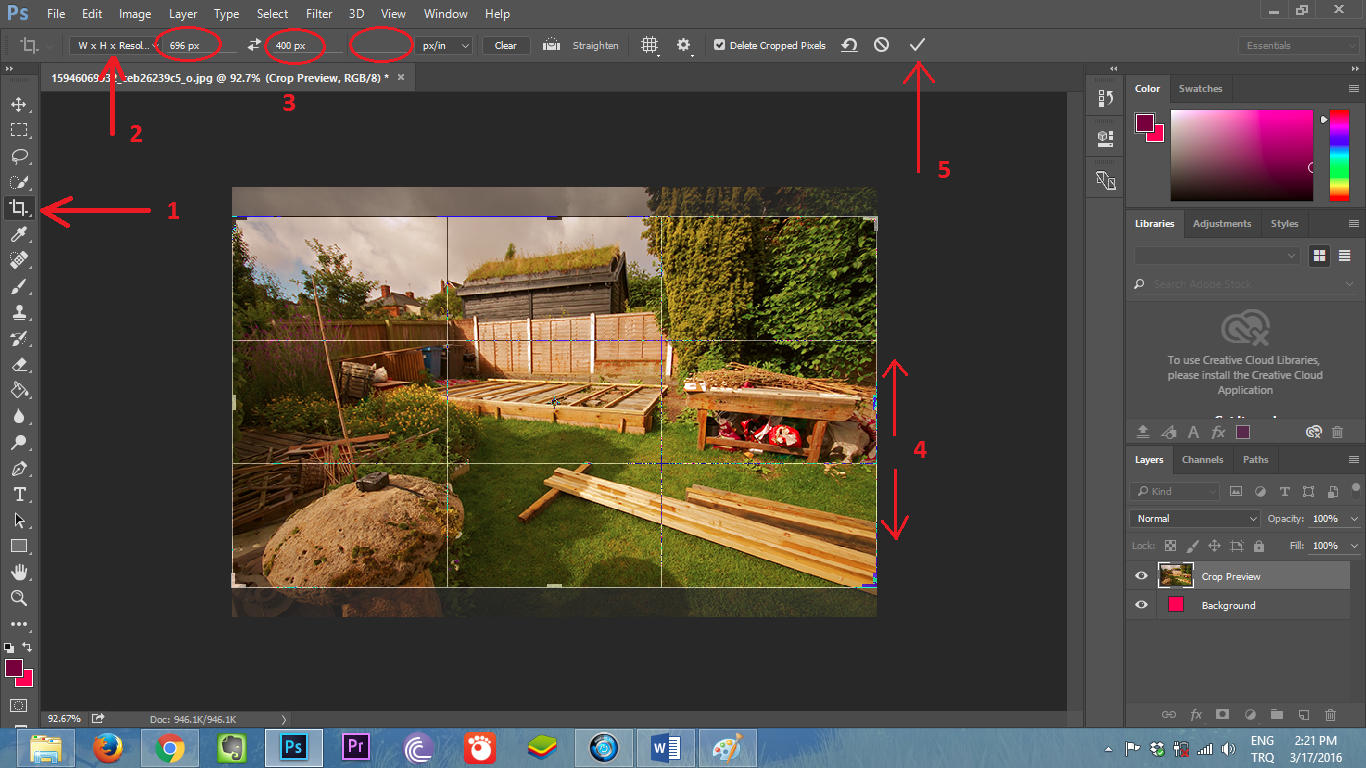
#1 – Click ‘Crop Tool’
#2 – Select ‘W x H x Resolution’.
#3 – Enter ‘696 px’ for width and ‘400 px’ for height and leave the last blank empty.
#4 – Now you can adjust the position of the image by dragging it up and down.
#5 – Click ‘Ok’ sign on top to finish.
5. Save The Image
Since we are done with resizing, let’s get back to compressing it.
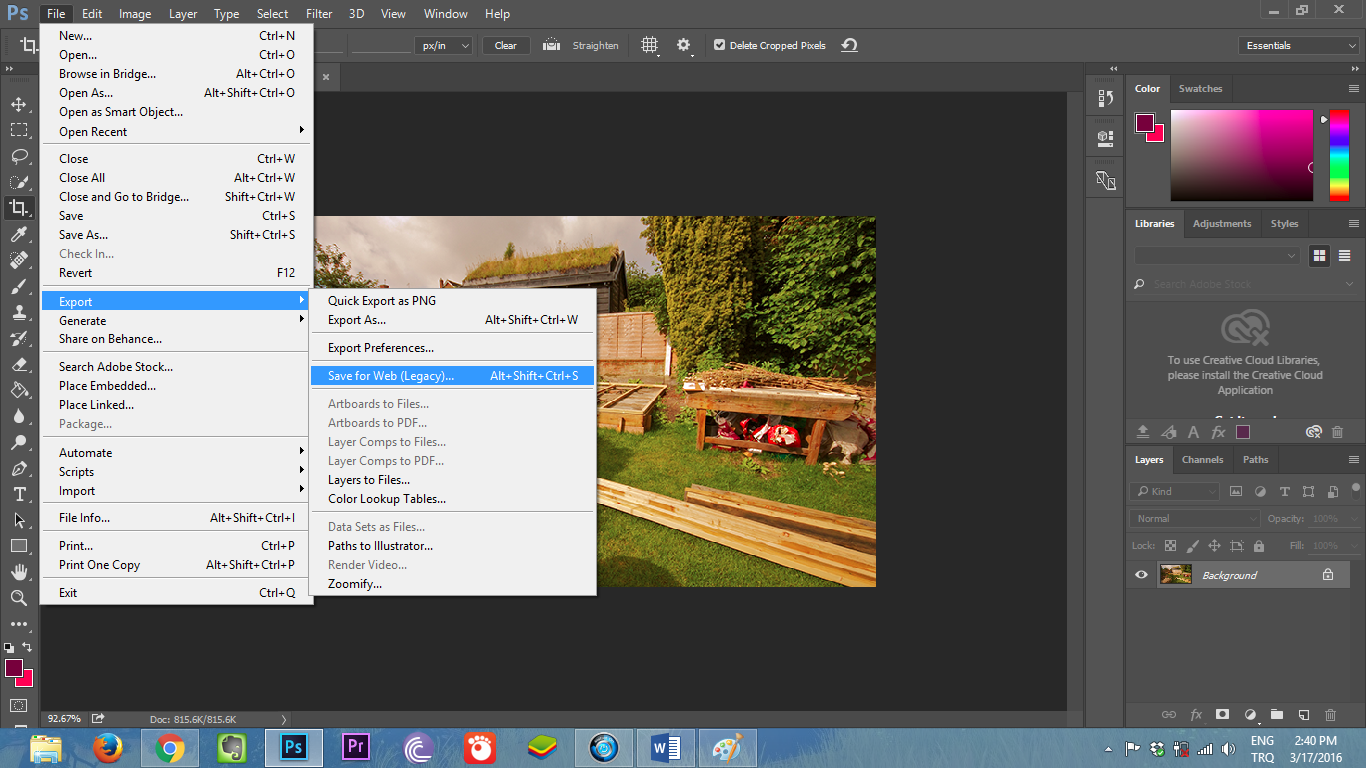
Click “File” then Export and then Save for Web (Legacy)…
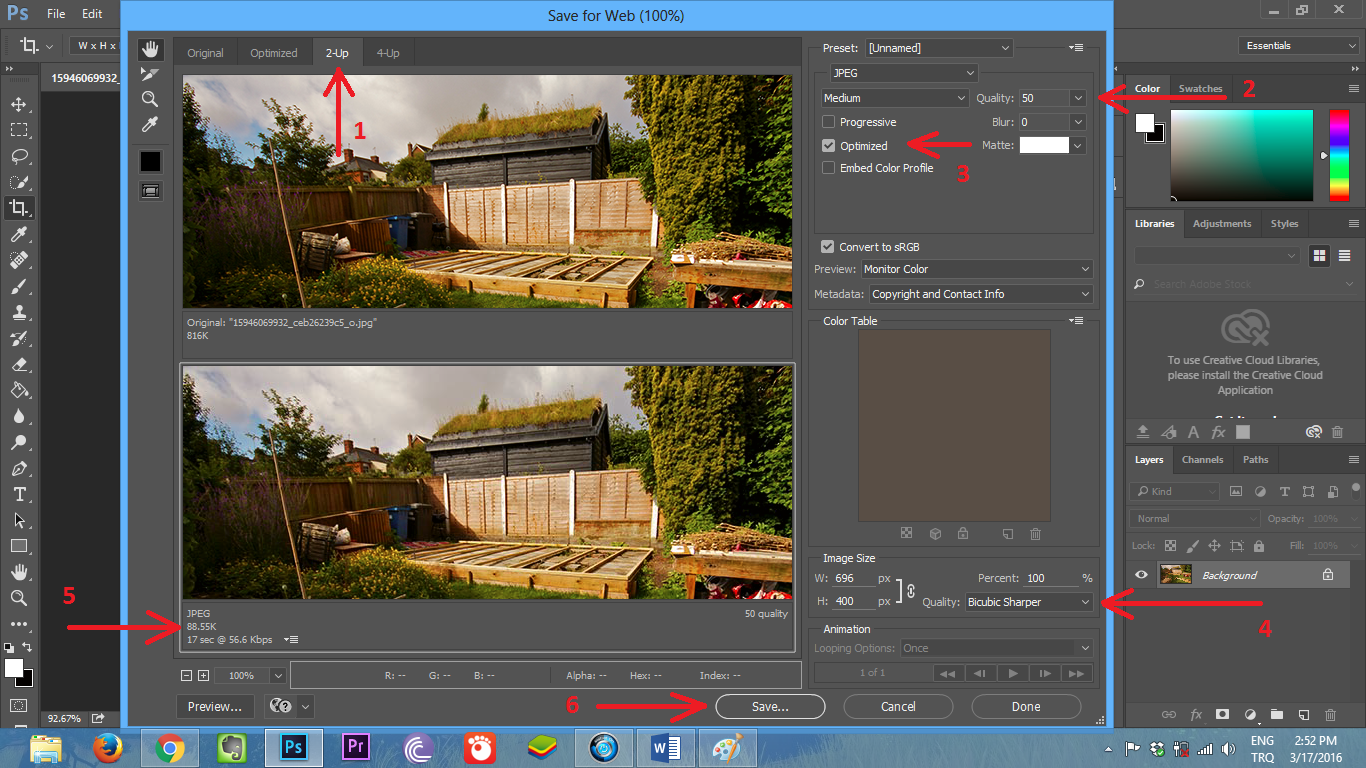
#1 – Select “2-Up” to see the difference between the original and the compressed image.
#2 – Select “Quality”. I normally try to make images below 50 KB, which occurs about 50% quality. But this picture contains so much green color and if images contain green so much, they can’t be compressed well enough so 88 KB is good for this picture.
#3 – Check “Optimized” option and leave others unchecked.
#4 – Select “Bicubic Sharper” below.
#5 – Always keep an eye on file size. If it exceeds 150 KB, check the steps you applied.
#6 – Click “Save” to finish the job.
Final Word: I am sure professional Photoshop users can optimize images way better than that with different settings but most of the bloggers work as one-man army, you are doing everything including writing articles, finding images, managing social media accounts, etc. and you shouldn’t waste more time than that to optimize an image. Even these steps may seem quite a long but once you get used to them, they won’t take even 2 minutes in total.